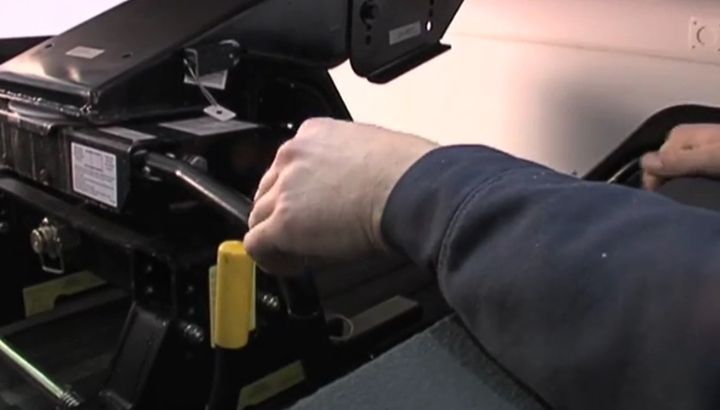
A 5th wheel trailer hitch installs in three stages: bolt the base rails to the truck frame (or factory puck system), lift the hitch base onto the rails and torque the mounting bolts to 80-110 ft-lbs, then drop the hitch head onto the base and verify the kingpin centerline sits directly over the rear axle.
Most trucks built after 2011 with HD packages (Ford F-250/350 Super Duty, Chevy Silverado 2500/3500 HD, RAM 2500/3500) ship with factory puck mounting points that turn this from a 6-hour fabrication job into a 2-hour bolt-on. Trucks without factory pucks need an under-bed rail kit installed first, which adds 2-4 hours and requires drilling through the bed floor. Either way, understanding how to install a 5th wheel trailer hitch correctly means matching the install method to your truck’s factory provisions and never skipping the torque sequence.
What Is A 5th Wheel Trailer Hitch?
A 5th wheel trailer hitch is a heavy-duty trailer connection system that mounts in a pickup truck bed and connects to a fifth-wheel trailer’s kingpin via a horseshoe-shaped jaw assembly. The hitch sits over the truck’s rear axle to distribute trailer weight directly onto the truck frame, supporting trailer weights from 16,000 lbs to over 30,000 lbs gross trailer weight.
This article covers in-bed 5th wheel trailer hitch installation specifically, not gooseneck hitches, bumper-pull trailer hitches, or pintle hitches. Each of those is a separate towing category with different installation requirements and load characteristics.
5th wheel trailer hitches fall under the broader category of heavy-duty trailer towing equipment governed by SAE J684 hitch class standards and SAE J2638 fifth-wheel kingpin standards. The hitch is rated by gross trailer weight and pin weight (the vertical load on the hitch head), not by tongue weight like bumper-pull hitches.
The system has six main components:
The base rails are the steel rails that mount to the truck frame and support the entire hitch assembly. Factory puck systems use truck manufacturer-specific quick-mount pucks. Aftermarket rail kits use steel cross rails that bolt through the truck bed floor.
The hitch head is the horseshoe-shaped jaw assembly that captures the trailer kingpin. Sliding 5th wheel heads add a rail mechanism that lets the head slide forward and back for short-bed truck cab clearance.
The kingpin jaws are the steel jaws inside the hitch head that close around the trailer kingpin. Single-jaw, double-jaw, and wraparound jaw designs all provide secure connection but with different release mechanisms.
The locking handle is the lever that opens and closes the kingpin jaws. Most modern hitches use a side-pull or front-pull handle accessible from outside the bed.
The mounting bolts secure the hitch base to the rails or pucks. Grade 8 hardware is required for the loads involved. Torque specifications run 80-110 ft-lbs depending on bolt diameter.
The pin and clip secure the hitch head to the base rails. Standard 5/8-inch pins with retention clips are used on most installations.
On my own 2020 Ford F-250 setup, I run a Curt Q24 5th wheel hitch (24,000 lbs GTW, 6,000 lbs pin weight rating) on the factory PuckSystem mounting points. The factory puck installation eliminates the under-bed rail kit and reduces install time from 6 hours to 2 hours.
The takeaway: a 5th wheel trailer hitch is a 6-component truck-bed mounting system rated for trailer weights well beyond bumper-pull hitch capacity.
What Tools And Parts Do I Need To Install A 5th Wheel Hitch?
You need a 5th wheel hitch kit (B&W, Curt, Reese, or Pullrite), a torque wrench rated to 150 ft-lbs, an electric drill with bi-metal hole saws (1-7/8 inch and 2-1/8 inch), a socket set with 3/4-inch and 15/16-inch sockets, a floor jack with a transmission saddle adapter or strong helper, and basic hand tools.
Here is the complete tool and parts list for a typical 5th wheel hitch install:
| Item | Specification | Purpose | Cost |
|---|---|---|---|
| 5th Wheel Hitch Kit | 16,000-30,000 lbs GTW rating | Main hitch assembly | $700-$2,500 |
| Mounting Rail Kit (if no factory pucks) | Vehicle-specific bolt-on | Rail system | $200-$400 |
| Torque Wrench | 1/2-inch drive, 50-250 ft-lbs range | Critical bolt torque | $80-$200 |
| Electric Drill | 1/2-inch chuck, corded preferred | Bed hole cutting | $80-$150 |
| Bi-Metal Hole Saws | 1-7/8 inch and 2-1/8 inch | Bed floor holes | $40-$60 |
| Socket Set | 3/4 inch, 15/16 inch, 18mm, 21mm | Bolt installation | $50-$100 |
| Floor Jack | 2-ton minimum with transmission saddle | Lift hitch head | $80-$200 |
| Reciprocating Saw or Jigsaw | For bed liner cutting (optional) | Bed liner modifications | $60-$120 |
| Tape Measure | 25 ft minimum | Position verification | $15-$30 |
| Center Punch | Steel | Mark drill positions | $5-$10 |
| Penetrating Oil | PB Blaster or Liquid Wrench | Factory bolt removal | $6-$10 |
| Anti-Seize Compound | Copper or nickel-based | Thread protection | $8-$15 |
| Helper | Human being | Hitch head positioning | Free |
The 5th wheel hitch kit varies dramatically in price based on capacity and features. Basic fixed-head hitches like the Curt A16 (16,000 lbs GTW) run $700-$900. Mid-tier sliding hitches like the B&W Companion (20,000 lbs GTW) run $1,200-$1,500. Premium auto-sliding hitches like the Pullrite SuperGlide (24,000 lbs GTW) run $2,000-$2,500.
The torque wrench is non-negotiable for 5th wheel hitch installs. The bolts that secure the hitch base to the rails or pucks must be torqued to 80-110 ft-lbs (depending on bolt diameter), and the rail-to-frame bolts on aftermarket kits run 100-150 ft-lbs. A 1/2-inch drive torque wrench rated to at least 150 ft-lbs is required. Click-style torque wrenches from Craftsman, DeWalt, or Pittsburgh Pro work fine for this application.
The electric drill and bi-metal hole saws are required only if you are installing an aftermarket rail kit that requires drilling through the truck bed floor. Trucks with factory puck systems do not require drilling.
The floor jack with transmission saddle adapter or a strong helper is needed because the 5th wheel hitch head weighs 100-200 lbs depending on the model. The Curt Q24 weighs 145 lbs. The B&W Companion weighs 195 lbs. Lifting this weight into position safely requires either mechanical lifting or 2-3 people.
On my own contractor truck setup, I keep a Pittsburgh Pro 1/2-inch torque wrench rated to 250 ft-lbs, a corded DeWalt drill, and a Craftsman bi-metal hole saw set in my install kit. The same tools handle gooseneck installs, hitch ladder rack installs, and standard receiver hitch jobs.
The takeaway: $300-$500 in tools plus $700-$2,500 for the hitch kit covers a complete DIY 5th wheel hitch install.
How To Install A 5th Wheel Trailer Hitch (Step By Step)
Verify your truck has factory puck provisions or install an aftermarket rail kit first, position the 5th wheel hitch base over the rails or pucks, bolt the base to the mounting points with the supplied hardware, install the hitch head onto the base, torque all bolts to specification, and verify the hitch position is centered over the truck’s rear axle.
The complete install sequence for a typical factory puck system installation:
Step 1: Verify Your Truck Has Factory Puck Provisions
Inspect the truck bed for the factory puck mounting points. Modern Ford F-250/350 (Super Duty 2011+), Chevy Silverado 2500/3500 (HD 2011+), GMC Sierra 2500/3500 HD, and RAM 2500/3500 (2015+) trucks typically include four to six factory puck mounting points. The pucks are flush-mount steel discs in the bed floor with threaded inserts for the hitch bolts.
If your truck has factory pucks, skip the rail kit installation in Step 2. If your truck does not have factory pucks, install the aftermarket rail kit first as a separate sub-project that takes 2-4 hours.
Step 2: Install The Aftermarket Rail Kit (If Required)
For trucks without factory pucks, install the aftermarket rail kit before the hitch base. The rail kit installation involves marking the bed floor for the drill positions, drilling 1-7/8 inch holes through the bed floor, sliding the cross rails under the bed, bolting the rails to the truck frame using the supplied frame brackets, and bolting the bed floor to the rails through the new holes.
The rail kit install requires lifting the truck bed slightly or working under the bed to access the frame mounting bolts. Plan 2-4 hours for the rail kit install plus the additional hitch base install time.
Step 3: Clean The Mounting Points
Wipe down the factory pucks or the installed rail kit surface with a clean rag. Apply a small amount of anti-seize compound to the threaded inserts to prevent corrosion-related thread damage. The mounting points must be clean and dry before installing the hitch base.
Step 4: Position The 5th Wheel Hitch Base
Lift the 5th wheel hitch base into the truck bed using a floor jack with transmission saddle or with help from one or two assistants. The base weighs 50-100 lbs depending on the model and is awkward to handle solo.
Position the base over the factory pucks or rail kit mounting points with the receiver opening facing rearward. The base should align with all four mounting positions without forcing or shimming.
Step 5: Insert The Mounting Bolts
Drop the supplied bolts through the hitch base mounting flanges and into the factory pucks or rail kit threaded holes. Hand-thread each bolt to finger-tight before applying any torque. All four bolts should hand-thread smoothly. If any bolt binds or feels rough, the base is misaligned and needs repositioning.
Step 6: Torque The Base Mounting Bolts
Tighten each base mounting bolt to the manufacturer-specified torque value in a star or cross pattern. Most installations require 80-110 ft-lbs per bolt depending on bolt diameter (typically 5/8-11 or 3/4-10). Apply torque in three passes: 30% of final torque on the first pass, 70% on the second pass, and 100% on the third pass.
The star pattern distributes clamping force evenly across the hitch base flange. Skipping the pattern can warp the base and create uneven contact with the mounting surface.
Step 7: Install The Hitch Head Onto The Base
Lift the 5th wheel hitch head onto the base using a floor jack with transmission saddle or with help from one or two assistants. The head weighs 100-200 lbs depending on the model and is the heaviest single component in the install.
Position the head into the base’s pin holes and align the locking pin positions. Insert the head-to-base pins and secure with the retention clips. The head should sit firmly on the base with no rocking or visible gap.
Step 8: Verify Position Over The Rear Axle
Measure from the truck’s rear axle centerline to the kingpin receiver center on the hitch head. For a fixed-head hitch, the kingpin position should be directly over or slightly forward of the rear axle. For a sliding head, the centered position should be over the axle with sliding range available in both directions.
Position too far forward causes the trailer to push the front of the truck bed into the cab during turning. Position too far rearward shifts trailer weight behind the axle and reduces front-axle weight. Adjust the head position as needed before final tightening.
Step 9: Test The Kingpin Jaw Operation
Operate the locking handle to verify the kingpin jaws open and close smoothly. The handle should move with moderate hand force without binding. Lubricate the jaw pivot points with white lithium grease if movement is stiff.
Insert the supplied test kingpin or a measuring tool to verify the jaws close around the correct 2-inch kingpin diameter. The jaws should grip the test pin firmly with no visible gap.
Step 10: Add Safety Chain Anchors And Final Inspection
Install the supplied safety chain anchor points or verify that factory anchor points are accessible. Most 5th wheel hitches include eyelet anchors that bolt to the hitch base for emergency chain connection.
Walk around the truck bed and inspect all bolts, pins, and clips. Verify that nothing is loose, missing, or improperly aligned. Re-torque all bolts after 100 miles of driving to compensate for any settling.
What this means: a careful 3-6 hour install delivers a permanent 5th wheel mounting point that supports trailer weights up to the hitch’s rated capacity.
What Are The Common Mistakes I See In Contractor Lots With 5th Wheel Hitch Installs?
After 16 years installing 5th wheel hitches and watching contractors and DIYers handle the work, here are the install mistakes that come up most often.
The first mistake is skipping the rail kit install on trucks without factory pucks. Some installers bolt the 5th wheel hitch base directly to the bed floor without an under-bed rail system. The bed floor is sheet metal, not structural frame, and cannot support the loads involved. The bed floor deforms within a few hundred miles of towing.
The fix is always installing a proper under-bed rail kit that bolts to the truck frame, then mounting the hitch base to the rails. The rail kit adds $200-$400 to the parts cost but is non-negotiable for safe installation.
The second mistake is using inadequate torque on the mounting bolts. Hand-tight or partial-torque bolts loosen under the cyclic loads of towing, and a loose hitch base can shift during driving. The first symptom is usually creaking sounds during turning, followed by visible movement of the hitch base.
The fix is always using a torque wrench and following the manufacturer-specified torque value in a star pattern. Hand-tight is never adequate for 5th wheel hitches. Re-torque after 100 miles of driving to compensate for settling.
The third mistake is positioning the hitch incorrectly relative to the rear axle. Some installers position the kingpin centerline 2-4 inches behind the rear axle to gain bed space, which shifts trailer weight behind the axle and reduces front-axle weight.
The result is light steering, reduced front-axle braking, and unstable handling at highway speeds. The fix is positioning the kingpin centerline directly over or slightly forward of the rear axle. For sliding heads, the centered position should be directly over the axle.
The fourth mistake is ignoring cab clearance on short-bed trucks. Trucks with 5-foot or 6-foot beds (Ford F-150 Crew Cab, Chevy Silverado 1500 Crew Cab short bed) have insufficient clearance for trailer turning with a fixed-head hitch.
The fix is using a sliding 5th wheel hitch (B&W Companion Slider, Curt Q24 Slider, Pullrite SuperGlide) that lets the hitch head slide rearward during sharp turns. Long-bed trucks (8-foot beds on Ford F-250, Chevy Silverado 2500, RAM 2500) have adequate clearance with fixed-head hitches.
The fifth mistake is treating the hitch install as a one-time job and never inspecting it afterward. The cyclic loads of towing can develop crack initiation sites at high-stress points (weld terminations, bolt heads, kingpin jaw pivots) over thousands of miles.
The fix is monthly visual inspection during the towing season and an annual torque check on all mounting bolts. Spend 10 minutes once a month looking at the welds, the bolts, and the kingpin jaws for any visible wear or damage.
On a job in Lakewood in 2022, a customer brought me his 2018 Ford F-250 with a Curt 5th wheel hitch he had installed himself two years earlier. The mounting bolts had loosened to roughly half their specified torque due to never being re-checked after the initial install.
The fix was a torque wrench session that took 30 minutes and saved him from a potential hitch failure on his next 8,000-mile road trip. The customer had not realized that the 100-mile re-torque check was as critical as the original install.
The takeaway: every 5th wheel hitch install mistake is preventable with proper rails, torque, position, cab clearance consideration, and periodic inspection.
How Much Does It Cost To Install A 5th Wheel Trailer Hitch?
Installing a 5th wheel trailer hitch costs $700 to $3,500 total turnkey, including the hitch unit ($700-$2,500), rail kit if needed ($200-$400), and professional installation labor ($300-$600). DIY installation drops the total cost to $700-$2,900 by eliminating labor.
The cost breakdown varies significantly based on the hitch model, the truck’s factory provisions, and where you take the work.
The 5th wheel hitch unit is the largest single expense. Fixed-head hitches from Curt (Q-series) and Reese (Elite) run $700-$1,200. Sliding hitches from B&W (Companion) and Curt (Q24 Slider) run $1,200-$1,800. Premium auto-sliding hitches from Pullrite (SuperGlide) run $2,000-$2,500.
The under-bed rail kit adds $200-$400 if your truck does not have factory puck provisions. Modern Ford Super Duty, Chevy/GMC HD, and RAM HD trucks built after 2011 typically include factory pucks at no additional cost.
Professional installation labor varies by shop type. RV dealerships charge $400-$600 for installation. Local hitch specialty shops charge $300-$500. Etrailer-affiliated installers charge $300-$450. Hitch installation is more complex than standard receiver hitch installation due to the bed work and rail kit handling.
DIY installation drops the labor cost to zero but requires $300-$500 in tools (torque wrench, drill, hole saws, sockets) if you do not already own them. The full DIY install takes 3-6 hours of garage time and requires moderate to advanced mechanical skills.
For trucks with factory pucks pulling smaller fifth-wheel trailers under 18,000 lbs gross weight, a $900 Curt Q20 plus $0 rails plus $0 DIY labor totals $900. For trucks without factory pucks pulling larger 5th wheels over 20,000 lbs gross weight, a $1,500 B&W Companion Slider plus $350 rail kit plus $450 professional installation totals $2,300.
What this means: budget $1,000-$2,500 for a complete 5th wheel hitch installation, with the exact cost depending on your truck and trailer size.
Frequently Asked Questions
How Long Does It Take To Install A 5th Wheel Trailer Hitch?
A 5th wheel trailer hitch installation takes 3 to 6 hours total depending on whether your truck has factory puck provisions. Trucks with factory pucks (Ford F-250/350 2011+, Chevy Silverado 2500/3500 HD 2011+, RAM 2500/3500 2015+) install in 2-3 hours because no drilling or rail kit installation is required.
Trucks without factory pucks require an under-bed rail kit installation that adds 2-4 hours to the project. The rail kit install includes drilling holes through the bed floor, mounting cross rails to the truck frame, and bolting the bed floor to the rails. Professional installation runs 2-4 hours total because professionals have specialized tools and experience that DIYers typically lack.
Can I Install A 5th Wheel Hitch By Myself?
Yes, you can install a 5th wheel hitch yourself if you have basic to advanced mechanical skills, a torque wrench rated to 150 ft-lbs, a drill with bi-metal hole saws (for rail kit installs), and at least one helper for lifting the heavy hitch head into position. The hitch head alone weighs 100-200 lbs depending on the model and is unsafe to lift solo.
DIY installation saves $300-$600 in professional labor costs and is well within the capability of an experienced DIY mechanic. The most challenging steps are the rail kit installation on trucks without factory pucks, which requires drilling through the truck bed floor, and the hitch head lifting. With factory pucks, the install is straightforward bolt-on work that takes 2-3 hours.
Do I Need A Special Truck To Install A 5th Wheel Hitch?
Yes, you need a heavy-duty pickup truck to install a 5th wheel hitch. The minimum requirement is a 3/4-ton truck (Ford F-250, Chevy Silverado 2500, GMC Sierra 2500, RAM 2500) with adequate gross vehicle weight rating (GVWR), gross combined weight rating (GCWR), and rear axle weight rating to handle the pin weight (typically 15-25% of trailer gross weight).
Half-ton trucks (Ford F-150, Chevy Silverado 1500, GMC Sierra 1500, RAM 1500) typically lack the GVWR and rear axle capacity for 5th wheel trailers over 12,000 lbs gross weight. Some half-ton trucks have specific 5th wheel prep packages that increase capacity, but the heavier 3/4-ton or 1-ton trucks are the standard choice for 5th wheel trailer towing.
What Is The Difference Between A Sliding And Fixed 5th Wheel Hitch?
A fixed 5th wheel hitch keeps the hitch head in a single position over the truck’s rear axle. A sliding 5th wheel hitch includes a rail mechanism that lets the hitch head slide rearward 8-12 inches during sharp turns, providing additional clearance between the trailer and the truck cab.
Fixed hitches work well for long-bed trucks (8-foot beds on Ford F-250/350, Chevy Silverado 2500/3500, RAM 2500/3500). Sliding hitches are required for short-bed trucks (5-foot or 6-foot beds) where the trailer would otherwise contact the truck cab during sharp turns. Manual sliders require pulling a release handle before each tight turn. Auto-sliders like the Pullrite SuperGlide slide automatically during turning without manual intervention.
Can I Use A 5th Wheel Hitch With A Gooseneck Trailer?
You can use a 5th wheel hitch with a gooseneck trailer only with an adapter, and most installers and trailer manufacturers recommend against the conversion due to handling concerns. The kingpin on a 5th wheel trailer and the ball coupler on a gooseneck trailer are completely different mounting systems with different load characteristics.
For trucks that need to tow both types of trailers, a flip-over hitch like the B&W Turnoverball gooseneck (which converts between gooseneck and 5th wheel modes) is the safer solution. The Turnoverball provides a 2-5/16 inch gooseneck ball that flips down into a flush bed position when not in use, then accepts a separate 5th wheel companion adapter for fifth-wheel trailers. Total cost is $700-$1,500 for both components.
How Much Weight Can A 5th Wheel Hitch Hold?
5th wheel trailer hitches are rated by gross trailer weight (GTW) and pin weight (the vertical load on the hitch). Common ratings range from 16,000 lbs GTW (Curt A16) to 30,000 lbs GTW (B&W Companion OEM). Pin weight ratings typically run 4,000-7,200 lbs depending on the hitch model.
The actual maximum trailer weight is limited by the lower of the hitch rating, the truck GCWR, and the truck rear axle weight rating. A Curt Q24 hitch (24,000 lbs GTW) on a Ford F-250 with 20,000 lbs GCWR maxes out at 20,000 lbs trailer weight because the truck rating is lower. Always verify all three ratings before assuming the hitch’s GTW is your real limit.
The Bottom Line On How To Install A 5th Wheel Trailer Hitch
To install a 5th wheel trailer hitch, verify your truck has factory puck provisions or install an aftermarket rail kit first, bolt the hitch base to the mounting points and torque to 80-110 ft-lbs in a star pattern, install the hitch head onto the base, and verify the kingpin centerline is positioned directly over or slightly forward of the rear axle.
The full DIY install takes 3-6 hours depending on whether the truck has factory pucks. Total cost runs $900-$2,500 for parts (hitch unit plus optional rail kit) plus $0-$600 for professional installation. Modern Ford F-250/350, Chevy Silverado 2500/3500 HD, and RAM 2500/3500 trucks built after 2011 typically include factory puck systems that simplify the install.
Choose a fixed-head hitch for long-bed trucks, a sliding hitch for short-bed trucks, and verify your truck GVWR, GCWR, and rear axle weight ratings support the trailer you plan to tow. Done right, a properly installed 5th wheel trailer hitch lasts the life of the truck.