Last updated: May 25, 2026
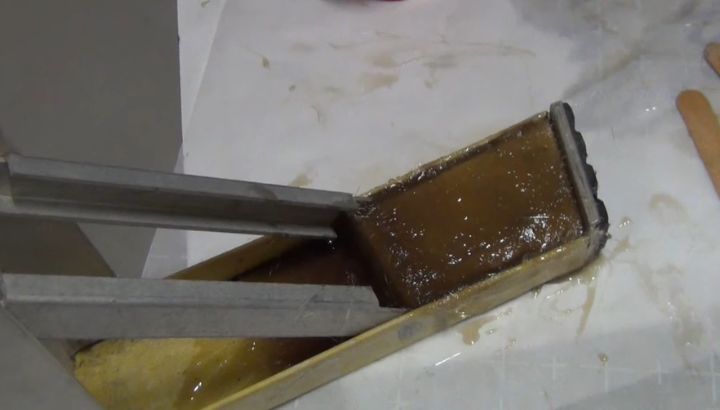
Repairing a fiberglass ladder is only safe for minor cosmetic damage: small surface scratches, light UV bloom (chalky fuzz), and worn rubber foot pads.Use a marine-grade two-part epoxy resin (West System 105/205) plus fiberglass cloth to seal small chips, sand and recoat UV bloom with a UV-resistant epoxy clear coat, and replace foot pads with manufacturer-matched parts.
Cracked side rails, split rungs, delaminated layers, and any impact damage from a fall mean the ladder is permanently out of service. ANSI A14.5 prohibits structural repair of fiberglass ladder rails or rungs.
Why Are Fiberglass Ladders So Hard To Repair Compared To Aluminum Or Wood?
Fiberglass ladders are hard to repair because the structural strength comes from the pultruded fiberglass-resin composite of the side rails, not from a single mendable material. Once those fibers are cracked, broken, or delaminated, no field repair can restore the original load rating.
A fiberglass ladder side rail is not solid fiberglass the way a fishing rod is. It is a pultruded composite, meaning glass fibers are pulled through a resin bath and cured into a structural shape under tension. The result is a hollow or semi-hollow rail with thousands of long glass fibers running the full length of the rail, bonded together by polyester or vinyl ester resin.
When a fiberglass rail cracks, the glass fibers themselves break. You cannot re-bond broken glass fibers in a field repair the way you can weld an aluminum crack or scarf-joint a broken wood rung. Even a professional fiberglass shop with vacuum infusion equipment cannot restore the original load rating to a cracked pultruded rail.
This is why ANSI A14.5-2017 (the American National Standard for portable fiberglass ladders) prohibits structural repair of damaged fiberglass ladder rails and rungs. The OSHA position under 1926.1053(b)(16) is the same: any portable ladder with structural defects must be tagged out of service or destroyed.
I have personally rejected dozens of fiberglass ladders from contractor fleets over the years for damage that the owners thought “looked fine.” The damage that matters is rarely obvious from the side. You have to inspect with a flashlight and a magnifying glass, looking for hairline cracks at the rung-to-rail joints and at impact points along the rails.
The takeaway: fiberglass ladders have an “all or nothing” repair window. Cosmetic damage is repairable. Structural damage means the ladder is destined for the landfill.
What Kinds Of Fiberglass Ladder Damage Can Actually Be Repaired?
You can safely repair UV bloom (chalky surface fuzz), shallow gel-coat scratches, small chips in the resin coating, worn rubber foot pads, frayed pulley rope, and damaged J-locks or pawls. You cannot safely repair cracked rails, split rungs, delaminated fiberglass, or any impact damage to the structural composite.
The split between repairable and non-repairable comes down to whether the damage compromises the load-bearing structure.
Repairable damage falls into five categories:
UV bloom is the chalky white powder that develops on fiberglass surfaces after 5 to 10 years of outdoor storage. It is degraded resin from UV exposure. The fibers underneath are still structurally sound. Repair involves sanding off the bloom and applying a UV-resistant clear coat.
Gel-coat scratches that do not penetrate the resin layer are cosmetic only. The colored outer layer of resin (typically yellow on Werner, orange on Louisville, brown on Little Giant) can be touched up with matching resin or paint.
Small resin chips under 1/4 inch wide that have not exposed the glass fibers underneath can be filled with marine-grade two-part epoxy.
Rubber foot pads wear out after 3 to 5 years of regular use. Replacement pads are sold by Werner (part numbers like 26-1 and 28-1), Louisville (part series LP-4030), and Little Giant for their model lines. Cost is typically $8 to $25 per pair.
Pulley rope on extension ladders frays and weakens after 5 to 10 years. Replacement rope is standard 3/8-inch braided nylon, available at any hardware store, and replacement is a 15-minute job.
Non-repairable damage includes any crack in a side rail (even hairline), any split or cracked rung, any delamination where the resin layer is separating from the fiberglass underneath, any impact damage from a drop or vehicle strike, and any deformation of the rail cross-section.
I had a Werner D6228-2 28-foot extension ladder fall off a truck rack at highway speed in 2018. The ladder looked fine to the eye. Under a magnifying glass, the base section had three hairline cracks at rung joints. That ladder went straight to scrap. The replacement cost $329. A fall from height because of a hidden crack would have cost vastly more.
The takeaway: when in doubt, retire the ladder. The replacement cost is always cheaper than the consequences.
How To Repair A Fiberglass Ladder (Step By Step)
For cosmetic repairs, sand the affected area with 220-grit sandpaper, clean with acetone, apply marine-grade two-part epoxy filler for chips, lay fiberglass cloth and West System epoxy resin for slightly larger surface repairs, then finish with a UV-resistant clear coat. Replace worn foot pads, pulley rope, and J-locks with manufacturer-matched parts.
The cosmetic repair sequence that actually works:
Step 1: Inspect The Full Ladder First
Before repairing anything, lay the ladder flat in good lighting and inspect every inch of both rails, every rung, every rivet, and every joint. Use a flashlight at low angle and a magnifying glass. Look for hairline cracks, delamination (visible as a lifted or bubbled resin layer), impact marks, and any deformation. If you find structural damage, stop. The ladder is finished.
Step 2: Identify The Specific Damage You Are Repairing
Categorize the damage: UV bloom (chalky surface), gel-coat scratch (visible line through color layer), small chip (missing material under 1/4 inch), worn foot pad (rubber compressed or cracked), frayed rope (visible broken fibers in the pulley rope), or worn J-lock pawl (rounded edges, sloppy engagement).
Step 3: Sand The Damaged Area
For UV bloom, sand the entire affected area with 220-grit sandpaper until the chalky layer is gone and you reach solid resin underneath. For chips and scratches, sand the immediate area around the damage with 220-grit, feathering the edges out about 1 inch from the damage center.
Step 4: Clean With Acetone
Wipe the sanded area with a clean rag and acetone. Let it flash dry for 2 to 3 minutes. Skipping this step is the most common cause of repair failure. Any oil, dirt, or sanding dust on the surface will prevent the epoxy from bonding.
Step 5: Mix The Two-Part Epoxy
For small chips, mix West System 105 epoxy resin with 205 fast hardener in the manufacturer-specified 5:1 ratio (use the calibrated pumps to avoid mistakes). For larger surface repairs requiring fiberglass cloth, use the same epoxy system. Total mix time should be about 1 minute, scraping the cup sides to fully blend.
Step 6: Apply The Repair Material
For chips, fill the missing material with epoxy until slightly proud of the surrounding surface. For surface repairs, lay a piece of 4 oz fiberglass cloth over the prepared area, then wet it out with mixed epoxy using a small foam brush. Work air bubbles out from the center toward the edges.
Step 7: Let Cure Fully Before Sanding
Allow West System 205 fast hardener 6 to 8 hours at 70 degrees Fahrenheit to reach full cure. Slower hardeners take longer. Do not test the repair until full cure. Premature handling weakens the bond.
Step 8: Sand Flush And Recoat
After full cure, sand the repair flush with the surrounding surface using 220-grit, then 320-grit for smoothness. Wipe with acetone again. Apply a UV-resistant clear coat (TotalBoat TableTop Epoxy with UV inhibitors, or a marine spar varnish) to protect the repair from future UV degradation.
Step 9: Replace Worn Parts
For foot pad replacement, remove the old rivet or screw, fit the new pad to the rail end, and secure with the original fastener type. For rope replacement on extension ladders, thread new 3/8-inch braided nylon rope through the pulley, tie a bowline at each end, and verify the fly raises and lowers smoothly. For pawl replacement, order the manufacturer-specific part and follow the included instructions.
Step 10: Load Test The Ladder
After any cosmetic repair, set the ladder up in normal working configuration and apply 1.5 times your body weight to the repair area for 30 seconds. Stand at the base and have a helper press down on the repaired section with sandbags or weight plates. If anything flexes, cracks, or shifts, the ladder is out of service.
What this means: cosmetic repairs are straightforward but require patience, the right materials, and an honest inspection to confirm the damage is actually cosmetic and not structural.
When Should I Replace A Fiberglass Ladder Instead Of Repairing It?
Replace a fiberglass ladder immediately when you find cracked rails, split rungs, delaminated fiberglass, impact damage from a fall, missing or broken rivets at rung joints, deformed rail cross-section, or any structural defect that compromises load capacity. Cosmetic damage and worn replaceable parts (foot pads, rope, pawls) are repairable. Structural damage is not.
The replacement decision is binary, not a judgment call. ANSI A14.5 sets the standard: any fiberglass ladder with structural damage must be removed from service.
The specific defects that mean replacement, not repair:
Cracked side rails at any point along their length. Even a hairline crack indicates that glass fibers have broken. The load rating is no longer reliable.
Split or cracked rungs. A rung failure under climbing load is a 6-foot drop minimum and frequently much more.
Delamination of the fiberglass layers, visible as bubbling, lifting, or separation of the resin surface. This indicates moisture intrusion or impact damage that has compromised the composite structure.
Impact damage from a fall, a vehicle strike, or being dropped from height. Even if the ladder looks fine externally, internal fiber damage is likely. ANSI A14.5 requires that any ladder dropped from height be inspected by the manufacturer or destroyed.
Missing or broken rivets at rung-to-rail joints. The rivets hold the rungs in place under load. A failed rivet means the rung is no longer structurally secured.
Deformed rail cross-section, where the rail has bent or twisted out of its original shape. The pultruded geometry depends on the original cross-section to carry load.
UV bloom that has penetrated through the resin layer into the fiberglass itself. Surface bloom is repairable. Deep bloom that shows visible loose fibers is not.
I retired a 24-foot Werner extension ladder from my own fleet last year that had passed the visual inspection but failed the load test. The ladder had been stored outside under a tarp for 8 years. The UV exposure had degraded the resin deep into the rail structure. Under the load test, the rail flexed visibly more than a new ladder of the same model. That ladder is now a garden trellis.
The replacement cost for a quality Type IA fiberglass extension ladder runs $250 to $400. The replacement cost for a Type IA fiberglass step ladder runs $80 to $200 depending on height. These are routine business expenses for any contractor.
Bottom line: if the damage affects load capacity, the ladder is finished. Buy a new one and sleep at night.
What Most Fiberglass Ladder Repair Guides Get Wrong
After 16 years inspecting ladders across contractor fleets, here are the omissions that bother me most in typical fiberglass repair content.
The first is the suggestion that you can repair cracked rails with fiberglass cloth and epoxy. You cannot. The original pultruded structure has thousands of continuous glass fibers running the full length of the rail under tension. A field repair with woven cloth and epoxy creates a patch that bonds to the surface but does not restore the broken structural fibers underneath. The repair will hold under static inspection load. It will fail under dynamic climbing load.
The second is the silence on ANSI A14.5 and OSHA 1926.1053 regulations. Most repair guides treat fiberglass ladder repair as a DIY project on par with patching drywall. It is not. ANSI prohibits structural repair. OSHA requires that damaged ladders be tagged out of service. A contractor who repairs a structurally damaged fiberglass ladder and continues to use it on a job site is exposed to OSHA citations, insurance denial, and personal liability for any injury.
The third is the wrong epoxy. Most guides recommend “any two-part epoxy” or generic hardware store epoxy. These products are not formulated for structural composite repair and will fail under load and UV exposure. The right products are marine-grade systems like West System 105/205, MAS Epoxies, or Total Boat 5:1 epoxy. These cost $40 to $80 for a basic kit but bond properly to fiberglass and resist UV degradation.
The fourth is the ignored topic of UV bloom severity. Surface bloom is a 30-minute sand-and-coat repair. Deep bloom indicates the resin has degraded into the fiber layer, which is non-repairable. Most guides treat all UV bloom as equivalent, which leads contractors to “repair” ladders that should have been retired.
The fifth is the omission of load testing after repair. Any repaired ladder, even one with only cosmetic work, should be load tested at 1.5 times the climber’s working weight before being returned to service. This catches hidden damage that was not visible during the visual inspection.
On a job in Lakewood in 2020, I watched a homeowner attempt to repair a cracked side rail on a 16-foot Type IA Werner extension ladder using hardware store epoxy and a piece of woven fiberglass cloth from a boat repair kit. He spent $35 on materials and 4 hours on the repair. The next weekend, the rail failed at the repaired section during normal use. He fell 11 feet onto his garage floor and broke his pelvis. The hospital bill cleared $42,000. A new Type IA Werner 16-foot extension ladder costs $189.
The takeaway: structural fiberglass ladder repair is a myth perpetuated by people who have never tested a failed repair under load.
What Tools And Materials Do I Need For Fiberglass Ladder Repair?
For cosmetic fiberglass ladder repair, you need 220-grit and 320-grit sandpaper, acetone, clean rags, marine-grade two-part epoxy (West System 105/205 or equivalent), 4 oz fiberglass cloth, a small foam brush, mixing cups with measurement marks, UV-resistant clear coat, and manufacturer-matched replacement parts for foot pads, rope, or pawls.
The full material list for a basic cosmetic repair kit:
West System 105 epoxy resin (16 oz size, around $40) and 205 fast hardener (3 oz size, around $20). Use the calibrated mini pumps (around $20) to avoid mix ratio mistakes. The 5:1 mix ratio is critical to full cure strength.
4 oz fiberglass cloth (12-inch by 12-inch piece, around $8). This is the lightweight cloth used for surface repairs. Heavier 8 oz cloth is overkill for cosmetic work.
220-grit and 320-grit sandpaper for surface prep and final smoothing.
Acetone for surface cleaning. A pint can lasts for dozens of repairs.
Clean lint-free rags for acetone wiping.
A small foam brush (the throwaway kind from the hardware store) for applying epoxy to the cloth.
Mixing cups with calibrated measurement marks. Solo brand 1-oz medicine cups work for small repairs.
UV-resistant clear coat. TotalBoat TableTop epoxy with UV inhibitors or a marine spar varnish (Helmsman, Petit Z-Spar) both work well.
Disposable nitrile gloves. Epoxy is a sensitizer. Skin contact builds toward allergic reaction over time.
For replaceable parts, identify your ladder model and order manufacturer-matched components. Werner foot pads, ropes, and pawls are available from Werner Service Parts. Louisville parts come from Louisville Ladder. Little Giant parts come direct from Little Giant.
Total kit cost is roughly $150 to $200 for a complete setup that handles dozens of cosmetic repairs. The kit pays for itself if you save even one ladder from premature retirement.
What this means: the right materials are non-optional for safe repair work. Hardware store generic epoxy and woven cloth from a craft store are not adequate substitutes.
Frequently Asked Questions
Can I Repair A Crack In A Fiberglass Ladder Rail?
No, you cannot safely repair a crack in a fiberglass ladder rail. ANSI A14.5-2017 prohibits structural repair of cracked fiberglass ladder rails or rungs because the broken glass fibers cannot be restored to their original load-bearing strength by any field repair technique.
The pultruded fiberglass-resin composite gets its strength from thousands of continuous glass fibers running the full length of the rail under tension. A surface patch with woven cloth and epoxy bonds to the exterior but does not restore the broken structural fibers underneath. Any cracked-rail repair will hold under static inspection but fail under dynamic climbing load. Replace the ladder immediately if any rail crack is found, regardless of crack size.
How Do I Fix UV Bloom On A Fiberglass Ladder?
Fix UV bloom on a fiberglass ladder by sanding the chalky surface with 220-grit sandpaper until you reach solid resin underneath, cleaning the sanded area with acetone, then applying a UV-resistant clear coat such as TotalBoat TableTop epoxy with UV inhibitors or a marine spar varnish like Helmsman or Petit Z-Spar.
Verify the bloom is only surface deep before starting. If sanding exposes loose glass fibers underneath the resin layer, the UV damage has penetrated into the structural fiberglass and the ladder must be replaced rather than repaired. Surface bloom is cosmetic and repairable. Deep bloom that has degraded the resin into the fiber layer is non-repairable structural damage under ANSI A14.5.
What Is The Best Epoxy For Fiberglass Ladder Repair?
The best epoxy for fiberglass ladder cosmetic repair is a marine-grade two-part epoxy system designed for structural composite work. West System 105 resin with 205 fast hardener is the industry standard. MAS Epoxies and TotalBoat 5:1 epoxy are equivalent quality alternatives.
Avoid hardware store generic epoxy, 5-minute epoxy, and craft store epoxy products. These are not formulated for structural composite repair, have inadequate UV resistance, and will fail under load and outdoor exposure. The marine-grade systems cost $40 to $80 for a basic kit but bond properly to fiberglass, resist UV degradation, and maintain strength under temperature cycling. Use the calibrated mini pumps to avoid mix ratio errors that compromise cure strength.
How Long Does A Fiberglass Ladder Last Before It Needs Replacement?
A fiberglass ladder lasts 10 to 15 years with regular use and proper storage, or up to 25 years with light use and indoor storage. UV exposure is the primary factor in fiberglass ladder degradation. Outdoor storage cuts the lifespan in half compared to indoor storage.
Inspect your fiberglass ladder before every use for cracks, delamination, UV bloom, worn foot pads, frayed rope, and damaged pawls. Replace immediately if any structural damage is found. Replace at the 10-year mark if the ladder has been stored outside, even if it appears undamaged, because internal fiber degradation is often not visible. A new Type IA fiberglass extension ladder costs $250 to $400 and is a routine business expense for any contractor.
Can I Use A Fiberglass Ladder That Was Dropped From My Truck?
No, a fiberglass ladder that was dropped from a truck or hitch ladder rack at any speed must be removed from service. ANSI A14.5 requires that any fiberglass ladder dropped from height be inspected by the manufacturer or destroyed. Internal fiber damage from the impact is frequently invisible during visual inspection but compromises the load rating.
The pultruded fiberglass composite cracks internally on impact even when the exterior appears undamaged. These hidden cracks fail under climbing load weeks or months after the drop. The replacement cost of a $300 ladder is trivial compared to a fall from height. Tag the dropped ladder out of service immediately, document the incident if it is a fleet ladder, and dispose of it properly.
How Do I Replace The Rope On A Fiberglass Extension Ladder?
Replace the rope on a fiberglass extension ladder by removing the old rope from the pulley, threading new 3/8-inch braided nylon rope (sold at any hardware store for around $1 per foot) through the pulley assembly, tying a bowline knot at the fly section attachment point, then tying a stopper knot at the base end with enough slack for full extension.
Measure twice the closed length of the ladder plus 6 feet of working slack to determine the rope length needed. A 28-foot extension ladder with a 16-foot closed length needs about 38 feet of rope. Cut the new rope with a hot knife to seal the cut ends and prevent fraying. Test the fly raise and lower with no load before climbing on the repaired ladder.
The Bottom Line On How To Repair A Fiberglass Ladder
Fixing a fiberglass ladder is only safe for cosmetic damage and worn replaceable parts. Surface UV bloom, shallow gel-coat scratches, small resin chips, worn rubber foot pads, frayed pulley rope, and damaged J-locks (pawls) are all repairable with the right materials and a careful approach. Marine-grade two-part epoxy (West System 105/205), 4 oz fiberglass cloth, 220-grit and 320-grit sandpaper, acetone, and a UV-resistant clear coat handle the cosmetic repairs. Manufacturer-matched parts handle the replaceable wear items.
Structural damage to a fiberglass ladder means the ladder is finished. Cracked side rails, split rungs, delaminated fiberglass, impact damage from a fall or vehicle strike, missing or broken rivets at rung joints, and deformed rail cross-section all require replacement under ANSI A14.5 and OSHA 1926.1053. No field repair can restore the original load rating to a damaged pultruded composite, regardless of what the internet might suggest.
The cost of a new Type IA fiberglass extension ladder runs $250 to $400. The cost of a Type IA fiberglass step ladder runs $80 to $200 depending on height. These are routine business expenses for any contractor, painter, electrician, or roofer. The cost of a fall from a structurally compromised ladder is measured in fractured pelvises, lost wages, and insurance denials.
The mistakes that lead to dangerous fiberglass ladder repairs are predictable. Wrong epoxy from the hardware store. Woven cloth patches on cracked rails. Skipped load testing. Surface inspection without flashlight and magnifying glass. Treating UV bloom as always-repairable. Continuing to use a ladder that was dropped from a truck.
Inspect thoroughly. Repair only cosmetic damage. Replace anything structural. That is how you repair a fiberglass ladder properly and how you make sure the next climb is not your last one.