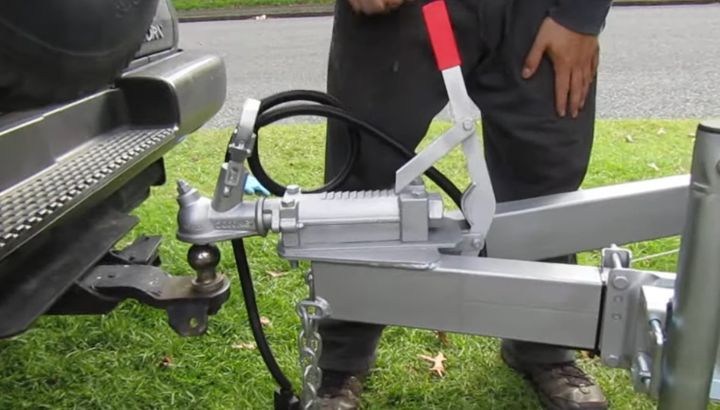
Factory bolt holes are already there on most cars built after 2005, hidden behind small plastic plugs on the rear frame rails. Pop the plugs, raise the car on jack stands, position the hitch against the frame, hand-thread the supplied bolts finger-tight, then torque to spec (typically 50-90 ft-lbs) in a cross pattern.
Compact sedans like the Honda Civic and Toyota Corolla accept Class I receivers (200 lbs tongue weight). Midsize sedans like the Camry and Accord support Class II (350 lbs). Large sedans, wagons, and crossovers can usually carry Class III. Anyone planning how to put a trailer hitch on a car should confirm the available class using the Curt or Reese fitment guide first, because cars rarely support the higher classes that SUVs and trucks handle without issue.
What Is A Trailer Hitch And What Does It Do On A Car?
A trailer hitch is a steel mounting assembly that bolts or welds to the rear frame of a car and provides a receiver tube for trailers, bike racks, ladder racks, cargo trays, and other hitch-mounted accessories. The receiver tube measures 1.25 inches or 2 inches across the opening and accepts a matching shank with a hitch pin.
This article covers permanent trailer hitch receiver installation on passenger cars specifically, not bumper-mount hitches, surface-mount hitches, or fifth-wheel hitches. Each of those is a separate category with different installation requirements.
Trailer hitches fall under the broader category of vehicle towing equipment regulated by SAE J684 hitch class standards. The class rating (I through V) determines what tongue weight and gross trailer weight the hitch can safely carry. Hitch bike racks, hitch ladder racks, and small utility trailers all require a compatible receiver class.
The hitch class options for cars specifically:
Class I (1.25-inch receiver) is the most common car hitch class. Caps at 200 lbs tongue weight and 2,000 lbs gross trailer weight. Fits compact sedans like the Honda Civic, Toyota Corolla, and Hyundai Elantra. Handles 1-2 bike hanging racks and small utility trailers.
Class II (1.25-inch receiver, higher rated) caps at 350 lbs tongue weight and 3,500 lbs gross trailer weight. Fits midsize sedans like the Toyota Camry, Honda Accord, and Hyundai Sonata. Handles 2-3 bike racks and small boat trailers.
Class III (2-inch receiver) caps at 500-600 lbs tongue weight and 6,000-8,000 lbs gross trailer weight. Fits large sedans, station wagons, and most crossovers like the Subaru Outback, Toyota Venza, and Honda Crosstour. Handles 4-bike platform racks and most utility trailers.
For most car installations, Class I or Class II is the right choice based on the vehicle’s frame strength. Trying to install a Class III hitch on a compact sedan is usually not possible because the frame mounting points are not engineered for the higher loads.
On a 2018 Honda Civic install I did last spring, I used a Curt Class I hitch (200 lbs tongue weight, 2,000 lbs gross trailer weight) for $130. The customer needed only a 2-bike rack capability, which the Class I handles easily. The install took 90 minutes including the wiring kit.
The takeaway: cars typically get Class I or II hitches matched to the vehicle frame strength, while SUVs and trucks support Class III and higher.
What Tools Do I Need To Put A Trailer Hitch On A Car?
You need a trailer hitch kit (vehicle-specific from Curt, Reese Towpower, Draw-Tite, or B&W), a torque wrench rated to 100 ft-lbs, a socket set with 17mm and 19mm sockets, a floor jack and 2 jack stands, anti-seize compound, penetrating oil, and basic hand tools (ratchet, breaker bar, pliers).
Here is the complete tool and parts list for a typical car hitch install:
| Item | Specification | Purpose | Cost |
|---|---|---|---|
| Trailer Hitch Kit (Class I or II) | Vehicle-specific bolt-on | Main hitch unit | $130-$220 |
| Torque Wrench | 1/2-inch drive, 25-100 ft-lbs range | Final bolt torque | $40-$120 |
| Socket Set | 17mm, 19mm sockets, 1/2-inch drive | Bolt installation | $30-$80 |
| Floor Jack | 2-ton minimum capacity | Vehicle lifting | $50-$150 |
| Jack Stands (Pair) | 2-ton minimum capacity | Vehicle support | $30-$80 |
| Penetrating Oil | PB Blaster or Liquid Wrench | Factory bolt removal | $6-$10 |
| Anti-Seize Compound | Copper or nickel-based | Thread protection | $8-$15 |
| Helper (Optional) | Human being | Hitch positioning | Free |
| Trailer Wiring Kit (Optional) | 4-pin flat connector | Trailer lighting | $30-$80 |
The trailer hitch kit is vehicle-specific. Curt, Reese Towpower, Draw-Tite, and B&W all publish online fitment guides that list the correct hitch part number for each car make, model, and year. Buying the wrong hitch wastes time and money because non-specific hitches will not bolt to the factory frame holes.
The torque wrench is essential for car hitch installs because car frames are lighter than SUV or truck frames. Over-torqued bolts can deform the thinner steel of a car frame, while under-torqued bolts loosen under vibration and cause hitch sag. A 1/2-inch drive torque wrench rated to 100 ft-lbs from Harbor Freight Pittsburgh or Craftsman runs $40-$120.
The floor jack and jack stands must be rated for your specific car weight. Most compact and midsize sedans weigh 2,800-3,500 lbs total, so a 2-ton floor jack and 2-ton jack stands are adequate. Always lift at the factory jack points specified in the owner’s manual to avoid frame damage.
The penetrating oil matters on cars older than 5 years. Factory bolt holes in the frame can corrode after years of road salt exposure. A 24-hour soak with PB Blaster or Liquid Wrench prevents stripped bolts and broken sockets.
What you do not need for most car hitch installs: a transmission jack (the hitches are light enough to hold by hand), a welder (modern cars use bolt-on installation), a drill (factory bolt holes are pre-drilled), or specialty tools beyond a basic mechanic’s hand tool set.
The takeaway: under $200 in tools plus $130-$220 for the hitch kit covers a complete DIY car hitch install.
How To Put A Trailer Hitch On A Car (Step By Step)
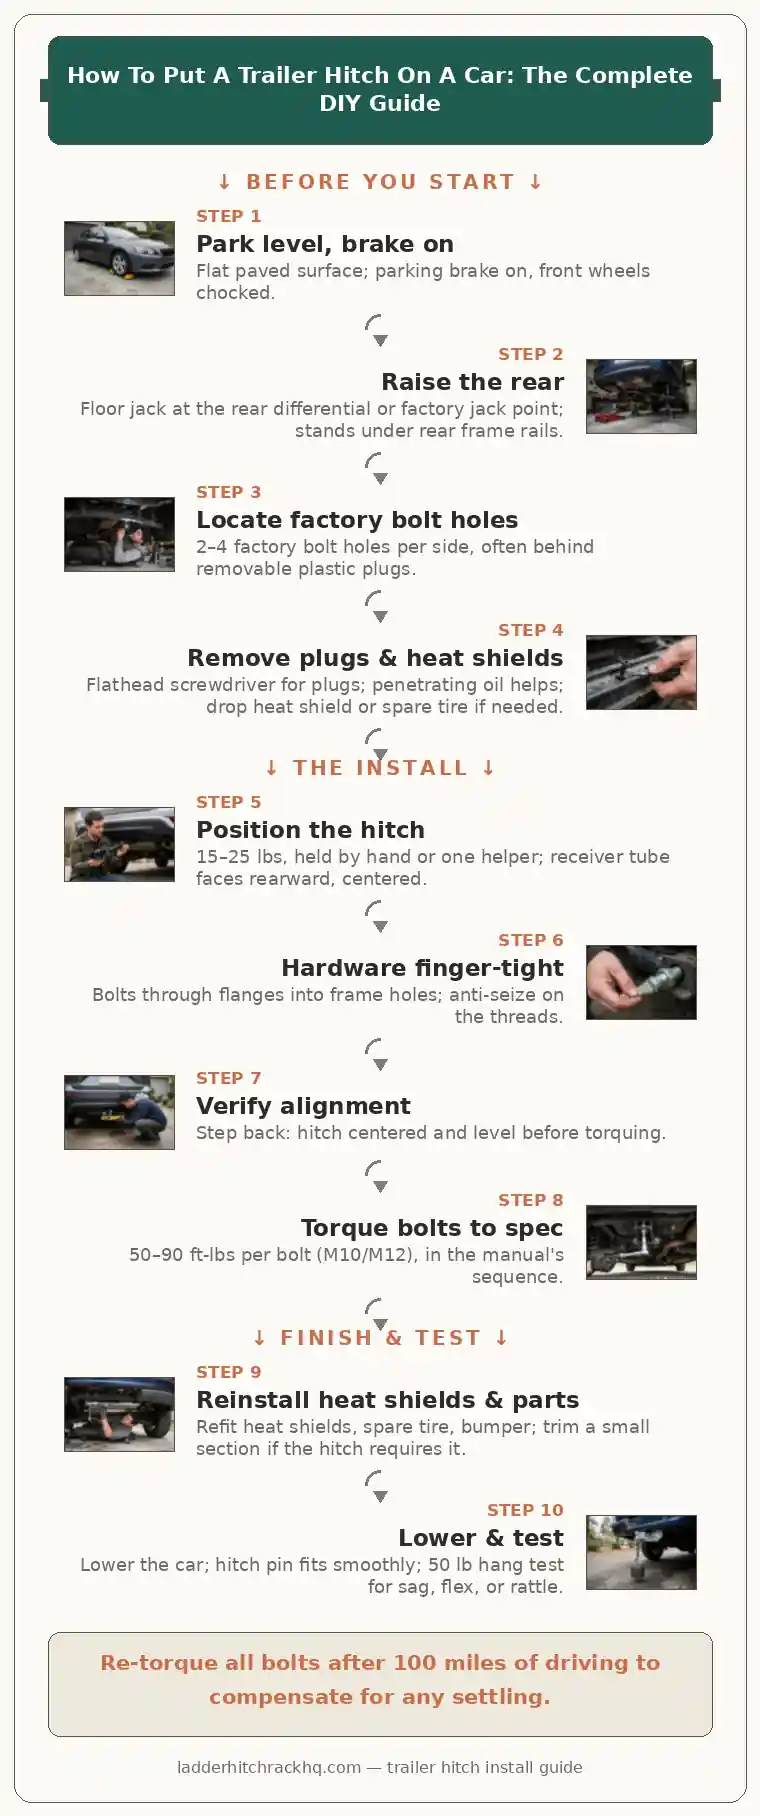
Park the car on a level surface, raise the rear of the car on jack stands, locate the factory bolt holes on the rear frame rails, position the hitch against the frame, install the supplied bolts finger-tight, then torque the bolts in the manufacturer-specified sequence to spec (typically 50-90 ft-lbs).
The complete install sequence that works on most modern cars with factory bolt-on provisions:
Step 1: Park On Level Ground And Set The Parking Brake
Park the car on a flat paved surface like a garage floor or concrete driveway. Engage the parking brake and chock the front wheels with wheel chocks or wood blocks. The car must be completely stable before any jacking work begins. Block out a half-day for the install to avoid rushing critical torque steps.
Step 2: Raise The Rear Of The Car
Use a floor jack at the rear differential or factory jack point to raise the rear of the car. Place jack stands under the rear frame rails or factory lift points and lower the car onto the stands. Verify stability by pushing firmly on the rear bumper before working underneath. Minimum clearance for hitch work is about 18 inches of ground-to-bumper height.
Step 3: Locate The Factory Frame Bolt Holes
Slide under the car and inspect the rear frame rails near the bumper. Most modern cars have 2-4 factory bolt holes per side, often covered by removable plastic plugs. Read the hitch installation manual to identify which holes match your specific receiver. The Curt and Reese installation guides include diagrams showing exact bolt-hole locations for each car make and model.
Step 4: Remove Factory Plugs Or Heat Shields
Remove any plastic plugs covering the factory bolt holes using a flathead screwdriver. Some cars require dropping the exhaust heat shield, the spare tire, or the rear bumper to access the mounting points. Apply penetrating oil to factory threads that have not been disturbed since the car was manufactured. Let the oil work for 5-10 minutes before attempting bolt installation.
Step 5: Position The Hitch Against The Frame
Lift the hitch into position against the rear frame. Most car hitches weigh 15-25 lbs and can be held by hand or with a single helper. The receiver tube should face rearward and align centrally with the rear of the car. Verify the hitch is level and the receiver opening sits between 13-18 inches off the ground for proper accessory ground clearance.
Step 6: Install The Supplied Hardware Finger-Tight
Insert the supplied bolts through the hitch mounting flanges and into the factory frame holes. Add a flat washer, lock washer, and nut to the inside of the frame rail. Apply a small amount of anti-seize compound to the bolt threads before final installation. Hand-thread all bolts to finger-tight before applying any torque.
Step 7: Verify Hitch Alignment
With all bolts finger-tight, step back and visually verify the hitch is centered and level. Adjust as needed by loosening individual bolts and shifting the hitch position. A misaligned hitch causes uneven tongue weight distribution and accelerated wear on the receiver tube.
Step 8: Torque The Bolts To Specification
Tighten each bolt to the manufacturer-specified torque value in the sequence specified in the install manual. Most car hitch installations require 50-90 ft-lbs per bolt depending on bolt diameter (M10 or M12). Apply torque in a star or cross pattern to distribute clamping force evenly across the hitch mounting flange.
Step 9: Reinstall Heat Shields And Components
Replace any exhaust heat shields, spare tire carriers, or bumper components removed during access. Verify all factory clips, brackets, and fasteners are reinstalled and tight. Some hitches require trimming a small section of the rear bumper plastic to clear the receiver tube opening. Use a sharp utility knife for clean cuts.
Step 10: Lower The Car And Test The Installation
Remove the jack stands and lower the car to the ground. Insert a standard hitch pin through the receiver tube and verify smooth fit. Test the installation by hanging a 50 lb weight from the receiver and checking for sag, flex, or rattle. Re-torque all bolts after 100 miles of driving to compensate for any settling.
What this means: a careful 1-2 hour install on a modern car delivers a permanent hitch mounting point that will outlast the vehicle itself.
What Cars Cannot Have A Trailer Hitch Installed?
Some compact cars, electric vehicles, and modified vehicles cannot have a trailer hitch installed because the rear frame lacks structural mounting points, the rear bumper assembly blocks access, or the manufacturer specifically prohibits aftermarket hitch installation. Check the Curt or Reese fitment guide before purchasing.
The cars that present hitch installation challenges fall into four categories.
Compact cars with subframe-only rear construction often lack rear frame rails strong enough to support a hitch. Some Smart cars, Mini Cooper models, and Fiat 500 variants have no aftermarket hitch options because the rear subframe was not engineered for hitch loads.
Electric vehicles vary widely in hitch compatibility. The Tesla Model S, Model X, and Model Y have factory-engineered hitches available as a $1,000-$1,200 factory option, but aftermarket hitches are limited. The Chevy Bolt has no aftermarket hitch option because the rear battery pack interferes with the mounting points. The Ford Mustang Mach-E has aftermarket hitch options at $400-$600.
Sports cars and convertibles often have no aftermarket hitch options because the rear structure includes the trunk hinge, fuel tank, or convertible top mechanism. The Mazda MX-5 Miata, Chevy Corvette, and most BMW Z-series have no aftermarket hitch options.
Modified vehicles with aftermarket rear bumpers, lifted suspensions, or custom rear bodywork may not accept a standard fitment hitch. These typically require welded installation by a custom fabrication shop at $300-$600 in labor.
The Curt, Reese Towpower, Draw-Tite, and B&W online fitment guides list every vehicle they make hitches for. If your specific year and model is not listed, an aftermarket hitch is not available. Custom fabrication is the only option, and it requires welded installation by a professional shop.
On a job in Lakewood in 2022, a customer brought me his 2017 Smart Fortwo asking for a hitch installation. After verifying no aftermarket hitch was available, we discussed alternatives including a trunk-mounted bike rack and a custom-welded receiver. He chose the trunk rack because the custom welded option would have cost more than the car was worth.
The takeaway: verify hitch availability using the manufacturer fitment guide before assuming any car can accept a hitch.
What Are Common Mistakes To Avoid When Installing A Car Hitch?
The five most common car hitch installation mistakes are skipping the torque wrench, installing on rusted frame holes without penetrating oil, choosing the wrong hitch class for future use, forgetting to add trailer wiring, and over-tightening bolts on lighter car frames.
The specific install mistakes I see most often on car hitch jobs:
Skipping the torque wrench is the biggest mistake on car frames specifically. Cars use lighter frame steel than SUVs and pickups, which means over-torqued bolts can deform the frame mounting flange. Under-torqued bolts loosen under vibration and cause hitch sag. A $40 torque wrench from Harbor Freight Pittsburgh is adequate for the job and pays back on the first install.
Installing on rusted frame holes without penetrating oil leads to stripped threads. Cars from salt-belt states (Michigan, Ohio, Pennsylvania) develop frame corrosion that locks factory bolt holes. The 24-hour PB Blaster pre-soak prevents 90% of stripped threads on older cars.
Choosing the wrong hitch class for future use is the most expensive mistake. A Class I receiver costs $30-$50 less than Class II but limits you to 200 lbs tongue weight. Two years later when you want a 2-3 bike rack, you have to buy and install a new Class II receiver. Total cost doubles compared to choosing Class II upfront.
Forgetting to add trailer wiring during the hitch install costs more later. Installing wiring at the same time as the hitch adds $30-$80. Adding it as a separate job later costs $80-$150 because the installer charges minimum shop time for a quick job.
Over-tightening bolts on lighter car frames is specific to car installs. Car frame steel is typically 3/16-inch thick versus 5/16-inch on trucks, which means car frame mounting flanges deform at lower torque values. Always use the manufacturer-specified torque value, not a generic “tight as you can” approach.
On a 2019 Toyota Corolla install last fall, a customer asked me to torque the hitch bolts to 120 ft-lbs because his neighbor said tighter is better. The Curt manual specified 60 ft-lbs for that vehicle. At 120 ft-lbs, I would have deformed the frame mounting flange and voided the warranty. We stayed at 60 ft-lbs and the install passed inspection without issue.
The takeaway: use a torque wrench, prep rusted bolts with penetrating oil, choose Class II minimum, bundle wiring with the hitch install, and respect the manufacturer torque spec for car frames specifically.
Do I Need Trailer Wiring When I Put A Hitch On My Car?
You only need trailer wiring on your car if you plan to tow a trailer with brake lights and turn signals or use a hitch accessory that blocks the factory taillights. Bike racks and small cargo carriers typically do not require wiring unless they block the rear lighting from view.
The wiring decision depends entirely on your intended use.
Hitch-mounted accessories like bike racks, hitch ladder racks, and cargo trays do not require trailer wiring because they are passive accessories with no electrical components. The receiver tube provides only the structural mounting point.
The exception is supplemental light kits for bike racks and cargo carriers that block the vehicle’s factory taillights or license plate. The Wesbar 54209-012 kit ($55) and Optronics MCL40RB kit ($45) wire to a 4-pin flat trailer connector to provide brake, turn signal, running light, and license plate illumination at the rear of the rack.
Trailers with brake lights and turn signals require a 4-pin flat connector. This is the standard for utility trailers, small boat trailers, and most lightweight trailers under 3,000 lbs. The Curt 56146 4-pin wiring kit costs $30-$80 and installs in 1-2 hours using a T-connector that taps into the factory taillight harness without cutting wires.
Trailers over 3,000 lbs with electric brakes require a 7-pin RV connector plus a brake controller. The Tekonsha P3 brake controller ($150-$200) mounts under the dashboard. The 7-pin connector kit and installation labor runs $200-$400 if done professionally.
For most car hitch installs targeting bike racks or small utility trailers, basic 4-pin wiring is the right choice. Add it during the hitch install for the lowest cost. Adding it later means paying for separate shop time and minimum labor charges.
What this means: bundle the 4-pin wiring with your hitch install for the best value, and skip 7-pin RV wiring unless you specifically plan to tow trailers with electric brakes.
Frequently Asked Questions
How Long Does It Take To Put A Trailer Hitch On A Car?
A typical DIY trailer hitch install on a car takes 1 to 2 hours on a modern vehicle with factory bolt-on provisions. First-time installers often take 2-3 hours including reading the manual and setting up tools. Professional installation at U-Haul, etrailer, or a local hitch shop runs 60-90 minutes plus paperwork.
The install time depends on three factors: the car’s factory provisions (bolt-on vs welded), the condition of the frame holes (clean vs corroded), and any heat shield or bumper modifications required for access. Salt-belt vehicles with rusted frame bolts can add 30-60 minutes to the timeline. Always block out a half-day for the install to avoid rushing critical torque steps.
Can I Put A Trailer Hitch On Any Car?
You can put a trailer hitch on most cars built in the last 20-30 years, but some compact cars, electric vehicles, and modified vehicles have no available aftermarket hitch options. The Smart Fortwo, Chevy Bolt, Mazda MX-5 Miata, and some BMW Z-series sports cars have no aftermarket hitch options because of frame design or interference with other components.
Verify your specific car has an available hitch using the Curt, Reese Towpower, or Draw-Tite online fitment guides. These guides list every car make, model, and year they manufacture hitches for. If your car is not listed, custom welded fabrication is the only option, which costs $300-$600 at a professional shop.
How Much Does It Cost To Install A Trailer Hitch On A Car?
A trailer hitch installation on a car costs $250 to $500 total turnkey including the hitch unit ($130-$220 for Class I or II) and professional installation labor ($100-$200). U-Haul is typically the cheapest installer at $100-$150 for Class I or II bolt-on jobs. Local hitch shops and dealerships run $150-$300 in labor.
DIY installation drops the total cost to $170-$340 by skipping the professional labor. Most modern cars have factory bolt-on provisions that accept the hitch in 1-2 hours of garage time. Add $30-$80 for 4-pin trailer wiring if you plan to tow a trailer with brake lights. Verify your car has factory bolt-on provisions before attempting DIY.
Will Installing A Trailer Hitch Void My Car’s Warranty?
Installing a trailer hitch does not void your car’s warranty on the engine, transmission, or major drivetrain components. The Magnuson-Moss Warranty Act prevents automakers from voiding the entire warranty due to an aftermarket accessory installation, as long as the accessory does not directly cause a covered failure.
The exception is damage to the rear frame, body, or factory components caused directly by the hitch installation. If the installer cracks a frame weld or damages a bumper during the install, that specific damage may not be covered. Professional installation at a certified hitch shop provides workmanship warranty coverage that protects against this risk. Dealership installation provides the cleanest warranty coverage for vehicles under factory warranty.
What Tools Are Required To Put A Hitch On A Car Yourself?
The tools required to put a hitch on a car yourself include a torque wrench rated to 100 ft-lbs ($40-$120), a socket set with 17mm and 19mm sockets ($30-$80), a floor jack and 2 jack stands ($80-$230 combined), penetrating oil ($6-$10), anti-seize compound ($8-$15), and basic hand tools like a ratchet, breaker bar, and pliers.
A transmission jack ($80-$200) is helpful but not required for car hitches because most weigh only 15-25 lbs and can be held by hand. The full DIY tool kit runs $200-$400 if you do not already own the basic items. Once purchased, the tools handle all future hitch installs and many other automotive jobs. Total tool plus hitch cost is $330-$620 for DIY versus $250-$500 turnkey for professional installation.
What Class Hitch Should I Put On My Car?
For most cars, Class I (200 lbs tongue weight) or Class II (350 lbs tongue weight) is the correct hitch class. Compact sedans like the Honda Civic and Toyota Corolla take Class I. Midsize sedans like the Toyota Camry and Honda Accord can take Class II. Large sedans and station wagons may support Class III (500-600 lbs tongue weight).
Match the hitch class to your actual towing and accessory needs. Class I handles 1-2 bike hanging racks and small utility trailers up to 2,000 lbs. Class II handles 2-3 bike racks and trailers up to 3,500 lbs. Verify your specific car’s maximum hitch class using the Curt or Reese fitment guide before purchasing. Cars rarely support Class III or higher due to frame strength limitations.
The Bottom Line On How To Put A Trailer Hitch On A Car
To put a trailer hitch on a car, raise the rear of the car on jack stands, locate the factory bolt holes on the rear frame, bolt the hitch to the frame with the supplied hardware, and torque the bolts to manufacturer spec (typically 50-90 ft-lbs).
The DIY install takes 1-2 hours on most modern cars with factory bolt-on provisions. Total cost runs $170-$340 for parts and basic tools, versus $250-$500 turnkey for professional installation. Class I or II is the right hitch class for most cars based on frame strength.
Choose the right class for future use, prep rusted bolts with penetrating oil, use a torque wrench to respect car frame strength, and bundle wiring with the hitch install. Done right, a properly installed trailer hitch on a car lasts the life of the vehicle.